Diving into the world of sourdough, you’ve likely heard about the magic of cold fermentation. This method isn’t just a trend; it’s a game-changer for your baking routine. By allowing your dough to ferment in a cooler environment, you’re not only enhancing the flavor complexity but also improving the texture of your bread.
Whether you’re a seasoned baker or just starting, understanding how cold fermentation works can elevate your sourdough to the next level. Let’s explore why this technique is worth your time and how it can transform your baking.
Benefits of Cold Fermentation
When diving into the world of sourdough baking, understanding the cold fermentation process not only enhances your baking skills but also significantly improves the quality of your sourdough. Let’s investigate deeper into how cold fermentation benefits your sourdough bread.
Retarded Fermentation Process
During cold fermentation, the dough is refrigerated, vastly slowing down the activity of yeast and bacteria. This process, known as retarded fermentation, brings several key advantages:
- Greater Tolerance to Timing: It offers you a flexible schedule. If you’re busy, the dough can sit in the fridge for up to 24 hours without overproofing.
- Improved Texture: By slowing down the yeast activity, gluten has more time to develop gently. This means you’ll get a more open crumb and a better texture.
- Increased Strength: Cold fermented dough develops a higher tolerance to shaping and scoring, reducing the chances of dough collapse.
Implementing a retarded fermentation process is straightforward. After mixing your dough, let it undergo its initial rise at room temperature. Once this phase is complete, tightly cover the dough and place it in the refrigerator for the slow fermentation phase. This simple step significantly enhances the bread’s overall characteristics.
Enhanced Flavor Development
The cold fermentation process is not just about convenience or texture; it’s also a key player in flavor development.
- Complexity and Depth: The slow activity allows for the gradual transformation of sugars into acids, alcohols, and other flavor compounds. This results in a more complex and nuanced flavor profile.
- Sourness: For those who prefer a tangier sourdough, cold fermentation aids in the production of acetic acid. The cold environment favors the bacteria responsible for this sharper, sour flavor.
Summarizing, embracing the cold fermentation method in your sourdough baking routine leads to bread with improved texture, a flexible baking schedule, and notably enhanced flavors. Whether you’re experimenting with your first batch of sourdough or looking to refine your baking technique, integrating cold fermentation is a step toward crafting artisan bread right from your kitchen.
How to Cold Ferment Sourdough
Diving into the cold fermentation process in sourdough baking can transform your bread, making it more flavorful and easier to work with. Here’s how to master each step of the process.
Mixing the Dough
Your journey starts with the correct mixing of ingredients. Here’s what you need to keep in mind:
- Use the Right Measuring Tools: Precision is key in baking. Use a digital scale for all ingredients, including water, flour, starter, and salt.
- Water Temperature Matters: Aim for a water temperature around 78°F (25°C) to kickstart fermentation without speeding it up too much.
- Incorporate Ingredients Gradually: Add your starter to the water first, mixing until fully dissolved. Then, gradually mix in the flour until the dough starts to form. Salt should be the last addition, ensuring even distribution without direct contact with the starter.
- Autolyse for Better Gluten Development: After mixing, let the dough rest for 30 minutes. This autolyse period allows the flour to fully hydrate and begins gluten formation, leading to a dough that’s easier to shape and develops better texture.
Bulk Fermentation
The bulk fermentation stage is where the dough starts to rise and develop its structure and flavor.
- Keep Temperature Consistent: Ferment your dough at room temperature (68-70°F or 20-21°C) for the first 2-3 hours. This initial warmer phase helps activate the yeast.
- Stretch and Fold: Perform 4-6 sets of stretch and folds during the first 2 hours of bulk fermentation. This technique builds dough strength and evenly distributes temperature.
- Cold Ferment: After the initial room temperature fermentation, place your dough in the refrigerator. This can range from 12 to 72 hours depending on your schedule and desired sourness level. The longer the fermentation, the more complex the flavors.
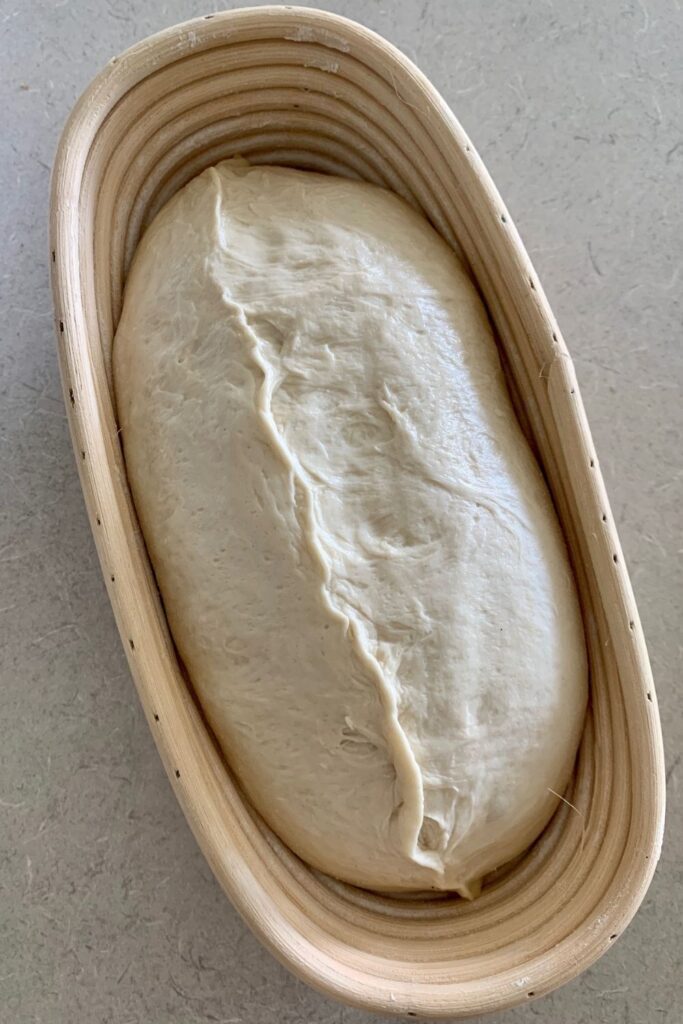
Shaping and Final Proof
Once fermentation is complete, shaping and the final proofing stage set the stage for baking.
- Gently Shape the Dough: Turn the dough onto a lightly floured surface. Shape it into a round or oval, depending on your preference, being careful not to deflate it too much.
- Prepare for Proofing: Line a basket or bowl with a floured towel. Place the shaped dough inside for its final proof.
- Final Cold Proof: Allow the dough to proof in the refrigerator for 3-4 hours or overnight. This final proofing step improves the dough’s flavor and makes it easier to handle and score before baking.
By following these steps, you’re well on your way to mastering cold fermentation sourdough, enhancing your bread’s flavor, texture, and overall quality without rushing the process.
Troubleshooting Cold Fermentation
Mastering cold fermentation in sourdough baking isn’t just about following a recipe to the letter. It’s also about identifying and fixing common issues that might arise during the process. Two of the most prevalent problems are over-fermentation and under-fermentation. Let’s jump into each and explore how to tackle them.
Over-fermentation
Over-fermentation occurs when the dough has fermented for too long, resulting in a texture that’s too acidic and a bread structure that may collapse. Key signs of over-fermentation include:
- Dough that spreads out and lacks volume
- A sour smell that’s stronger than typical sourdough tanginess
- An overly wet and sticky consistency
To prevent over-fermentation, consider:
- Reducing the fermentation time. If your kitchen is particularly warm, your dough might ferment faster than expected. Adjust the fermentation time accordingly.
- Lowering the starter amount. If over-fermentation is a consistent issue, try using less starter in your recipe. This will slow down the fermentation process.
- Checking your fridge temperature. For cold fermentation, your fridge should be at a stable temperature between 38°F to 42°F. If it’s warmer, the dough will ferment too quickly.
Under-fermentation
Under-fermentation happens when the dough hasn’t fermented long enough. This results in bread that’s dense, lacks flavor, and doesn’t have the characteristic sourdough texture and holes. Signs of under-fermentation include:
- A loaf that’s particularly dense or heavy
- Limited oven spring and a tight crumb structure
- Lack of tangy sourdough flavor
To fix under-fermentation, you can:
- Allow more fermentation time. If the dough doesn’t seem adequately risen or aerated, let it ferment for a longer period. Check it hourly to avoid over-fermentation.
- Increase the starter amount. If under-fermentation is a recurring issue, using more starter can accelerate the fermentation process, leading to better results.
- Ensure optimal fermentation conditions. Make sure your dough is fermenting in a place with a consistent temperature. If using cold fermentation, verify your fridge is set to the correct temperature range mentioned above.
By strategically adjusting your fermentation times, starter quantities, and ensuring your equipment is correctly calibrated, you can overcome these common sourdough fermentation issues. Each adjustment is a step towards perfecting your cold fermentation process, leading to delicious, high-quality sourdough bread every time. Remember, baking is as much about the journey as it is about the destination. Embrace the learning curve, and don’t be afraid to experiment.
Conclusion
Mastering the art of cold fermentation in sourdough is a game-changer for your baking journey. By understanding how to fine-tune the fermentation process, you’re well on your way to creating loaves that not only taste amazing but are also visually appealing. Remember, the key lies in striking the right balance between fermentation time, starter amount, and fridge temperature. With these strategies in hand, you’re equipped to tackle both over-fermentation and under-fermentation issues head-on. So go ahead, experiment with confidence, and watch as your sourdough bread reaches new heights of perfection. Happy baking.