As Halloween approaches, it’s time to whip up some spooky treats that’ll impress your friends and family. If you’re not in the mood to fire up the oven, the no bake Halloween chocolate slice is your perfect solution.
This delightful dessert combines rich chocolate with crunchy textures and festive flavors, making it a hit for any gathering.
No Bake Halloween Chocolate Slice
Craft this delightful no-bake Halloween chocolate slice with simple steps and minimal effort. Prepare to impress your guests with a spooky dessert that combines rich chocolate and festive elements.
What I Love About This Recipe
This no-bake Halloween chocolate slice simplifies holiday preparation. The quick steps eliminate the stress of traditional baking. Fewer steps mean more time for enjoying festivities.
This recipe requires minimal equipment. A bowl and a baking dish are your main tools. Even if the kitchen lacks elaborate gadgets, creating this treat remains effortless.
Ingredients are easily accessible. Common items like chocolate cookies and sweetened condensed milk are often on hand. If you don’t have items at home, grocery stores typically stock these essentials, minimizing shopping hassles.
Customization stands out as a significant benefit. You can mix in various add-ins such as nuts or dried fruits. Each batch can become unique with simple adjustments, suiting diverse tastes.
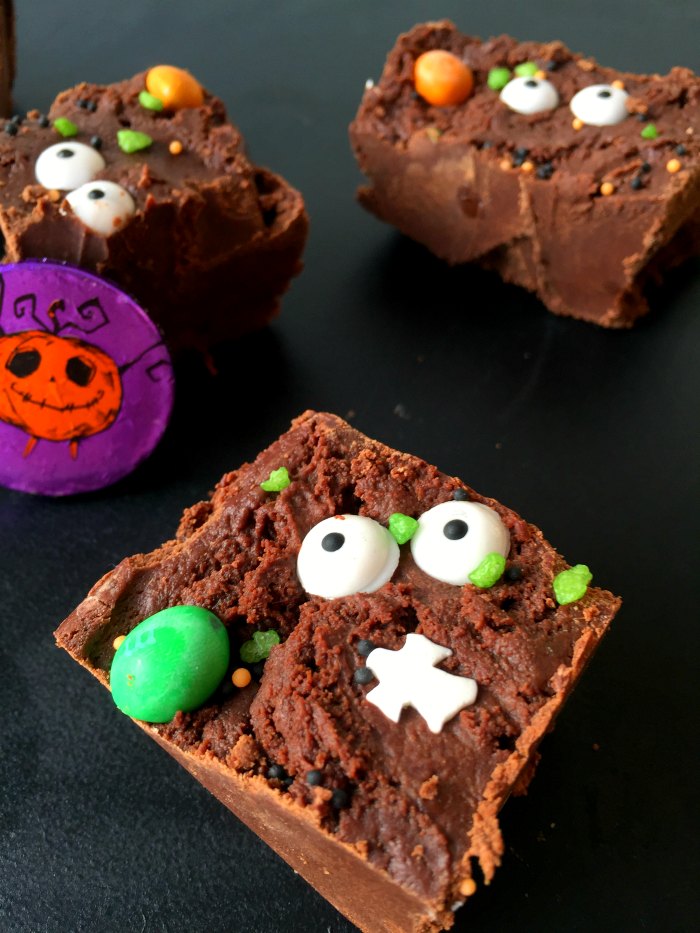
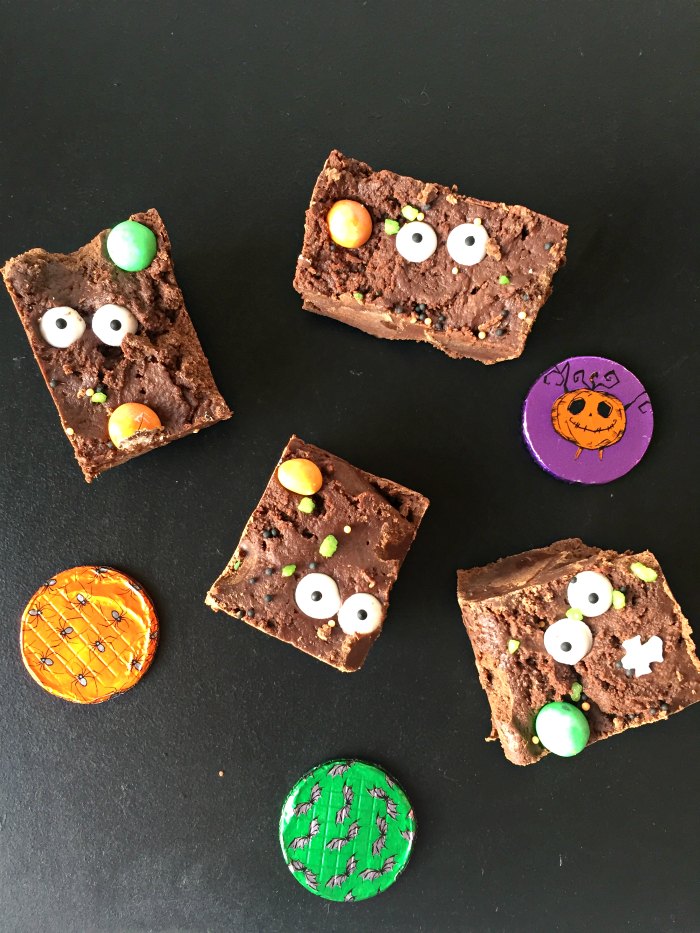
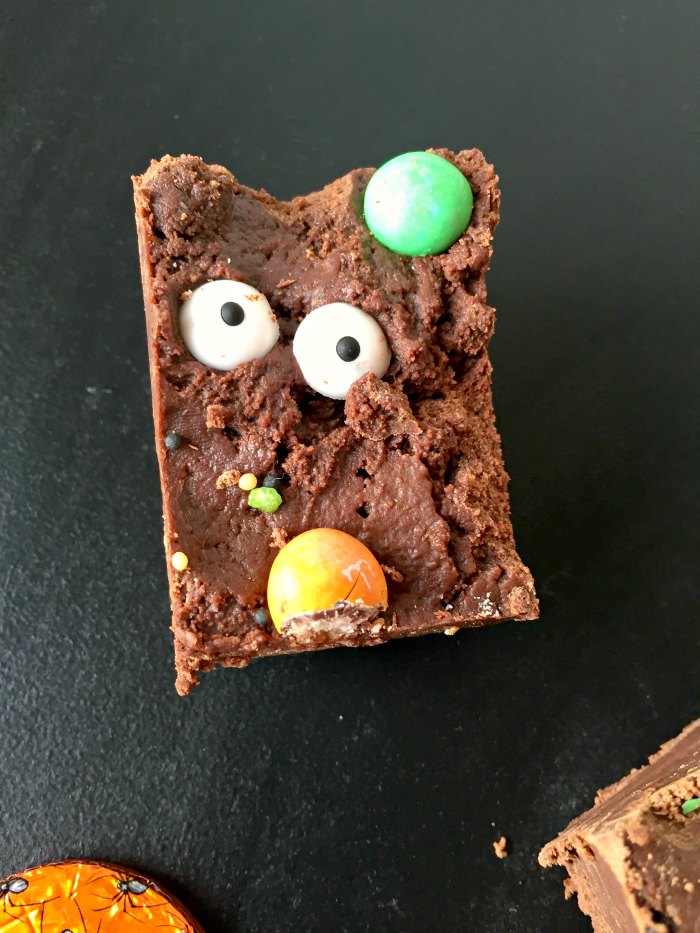
Presentation possibilities are endless. Decorating the slice allows for creative expression. Use gummy worms, candy eyes, or sprinkles to achieve a playful Halloween vibe.
Indulgence in rich flavors resonates with chocolate lovers. The creamy chocolate texture provides a satisfying treat without any baking. This chocolate slice effortlessly combines flavor and convenience, making it a perfect Halloween dessert option.
Ingredients
Crafting a no-bake Halloween chocolate slice requires a mix of essential and flavorful components. Here’s a breakdown of what you’ll need.
Required Ingredients
- 100g very soft unsalted butter: Ensures a smooth texture that binds the slice together.
- 100g light brown sugar: Adds sweetness and a hint of caramel flavor.
- Pinch of salt: Balances the sweetness and enhances the chocolate flavor.
- 1 tsp vanilla extract or vanilla bean paste: Offers aromatic depth to the chocolate slice.
- 400g plain chocolate: Forms the base of the slice; choose high-quality chocolate for the best taste.
- 1 tin (397g) of condensed milk: Provides creaminess and sweetness.
- 250g plain flour: Thickens the mixture and contributes to the structure.
- Halloween sprinkles: Perfect for festive decoration to enhance the presentation.
- Crushed chocolate cookies: Adds crunch and extra chocolate flavor if desired.
- Chopped nuts: Include almonds or walnuts for added texture.
- Dried fruits: Incorporate raisins or cranberries for a chewy element.
- Candy eyes or gummy worms: Use these for spooky decorations that elevate the Halloween theme.
These ingredients combine to create a rich, festive treat that delights both in flavor and appearance.
Tools
Gathering the right tools ensures a smooth preparation process for your no-bake Halloween chocolate slice. The following kitchen tools and equipment enhance your experience and assist in creating this festive dessert.
Kitchen Tools Needed
- Mixing Bowl: Use a large mixing bowl to combine the ingredients effectively. A glass or stainless steel option works best for holding heat if mixing warm ingredients.
- Spatula: Use a sturdy spatula to mix and ensure all ingredients blend evenly without damaging other tools.
- Measuring Cups and Spoons: Accurate measurements guarantee the ideal blend of flavors and textures. Use dry measuring cups for solid ingredients and liquid measuring cups for liquids.
- Baking Dish: A square or rectangular baking dish holds the chocolate slice mixture. A 9×9 inch or 8×8 inch dish works well for the right thickness.
- Parchment Paper: Line the baking dish with parchment for easy removal of the chocolate slice once set.
- Food Processor: A food processor simplifies the process of crushing cookies into fine crumbs, saving time and effort. This tool ensures a uniform texture for the base.
- Double Boiler or Microwave-Safe Bowl: Melt chocolate gently using a double boiler or a microwave-safe bowl. These methods prevent overheating the chocolate, ensuring a smooth melt.
- Refrigerator: Chilling the mixture in the refrigerator solidifies the chocolate slice, allowing it to set perfectly. Space is important for placing the baking dish flat.
- Sharp Knife: Use a sharp knife to cut the chocolate slice into even squares. This tool ensures clean cuts for a beautiful presentation.
Equipping yourself with these tools maximizes efficiency and enhances your enjoyment during the preparation of this delicious no-bake treat.
Preparation Steps
Follow these clear steps to craft your no-bake Halloween chocolate slice efficiently and enjoyably.
Step 1: Gather Ingredients
Collect the following ingredients for your chocolate slice: 8 ounces very soft unsalted butter, 1 cup light brown sugar, a pinch of salt, 1 teaspoon vanilla extract, 8 ounces plain chocolate, 14 ounces sweetened condensed milk, and 1 cup plain flour. Optional items include Halloween sprinkles, crushed chocolate cookies, chopped nuts, dried fruits, and spooky decorations like candy eyes or gummy worms.
Step 2: Prepare the Base
Line a 9-inch by 9-inch square tin with parchment paper or thick tin foil. This ensures easy removal after the slice sets. Adjust the lining method according to your preference for easier cleanup.
Step 3: Make the Chocolate Mixture
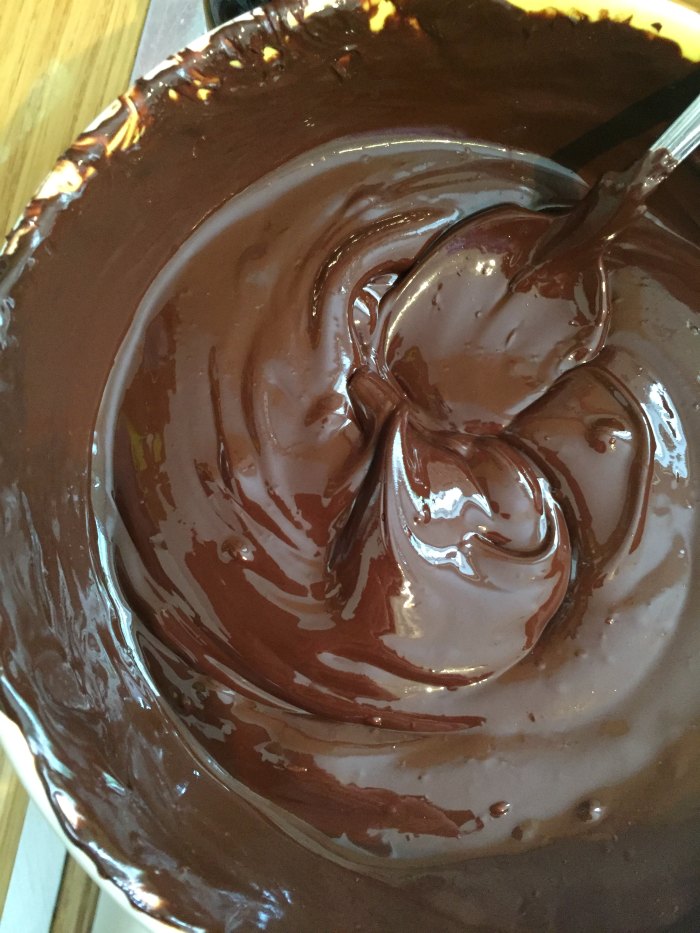
In a heatproof bowl, break the plain chocolate into pieces and melt it in the microwave. Use 30-second increments for melting, stirring the mixture after each interval until smooth. This prevents overheating and maintains a rich texture.
Step 4: Combine and Mix
In a stand mixer or large bowl, beat the very soft unsalted butter and light brown sugar together until creamy. Add the pinch of salt and vanilla extract, mixing thoroughly. Pour in the melted chocolate and sweetened condensed milk while the mixer runs. Gradually add the plain flour, using a spatula to scrape down the bowl and ensure all ingredients combine evenly.
Step 5: Set in the Fridge
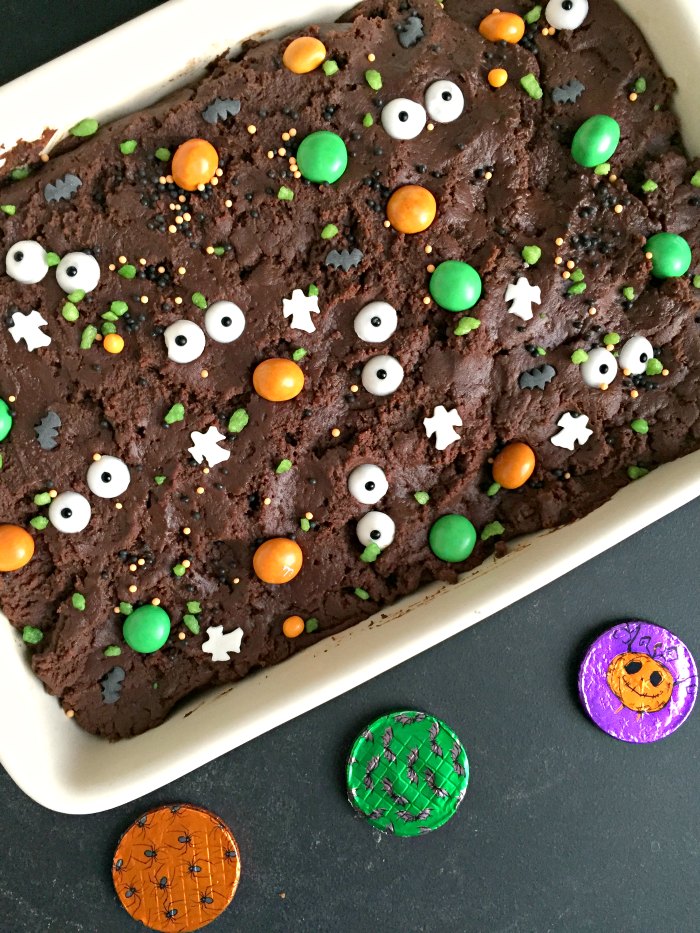
Scoop the combined mixture into the lined tin and flatten it using the back of a spoon. Top with Halloween sprinkles for decoration. Chill the pan in the refrigerator for about one hour to set. For a quicker option, place it in the freezer for 10 to 15 minutes before slicing.
Decoration Ideas
Enhance your no-bake Halloween chocolate slice with fun and creative decorations. Spooky toppings and imaginative presentation transform your dessert into a festive centerpiece.
Halloween-Themed Toppings
- Gummy Worms: Place gummy worms on top for a creepy-crawly effect.
- Candy Eyes: Add candy eyes to create a playful monster appearance.
- Halloween Sprinkles: Sprinkle themed confetti, like pumpkins or ghosts, for a colorful touch.
- Chocolate Shavings: Use dark chocolate shavings for an elegant contrast.
- Edible Glitter: Dust edible glitter over the top for a touch of magic.
- Marshmallow Ghosts: Position mini marshmallows shaped as ghosts around the slice.
- Pumpkin Candy: Arrange candy corn or pumpkin-shaped candies to enhance the fall theme.
- Themed Serving Plate: Choose a Halloween-themed platter for a festive display.
- Cookie Cutter Shapes: Use pumpkin or bat-shaped cookie cutters for individual portions.
- Layered Containers: Serve in clear jars to showcase layers, adding visual appeal.
- Festive Garnishes: Garnish with sprigs of mint for a fresh contrast.
- Mood Lighting: Use candles to create an inviting atmosphere during serving.
- Decorative Napkins: Pair with Halloween-themed napkins for added charm.
- Personalized Labels: Write fun names for each topping on labels for a creative touch.
Incorporate these ideas for a delightful treat that captivates guests and adds to your Halloween celebrations.

Easy No Bake Halloween Chocolate Slice
Ingredients
- 100 g very soft unsalted butter
- 100 g light brown sugar
- pinch salt
- 1 tsp vanilla extract or vanilla bean paste
- 400 g plain chocolate
- 1 397 g tin of condensed milk
- 250 g plain flour
- Halloween sprinkles
Instructions
- Prepare a 9 inch by 9 inch square tin by lining it with parchment paper or thick tin foil.
- In a stand mixer is the easiest way to make this slice, or you can a bowl and wooden spoon too. First, beat the butter and sugar together until they're fluffy and soft, then add the vanilla and salt and beat well. Meanwhile, break the plain chocolate into a heatproof bowl and melt in the microwave on 30 second increments, giving the mixture a stir after each 30 seconds.
- Next, add the tin of condensed milk to the butter sugar mixture with the mixer running, and beat well - it will be a very wet mixture at this point. Pour in the melted chocolate and mix for a moment, then add the plain flour and mix well, using a spatula to scrape down to the bottom of the bowl and combine everything.
- Scoop everything into your pan and flatten down with the back of a spoon.
- Top with your Halloween sprinkles. Pop the pan into the fridge to set - for about an hour, or if you really are in a rush, in the freezer for 10 - 15 minutes.
- Remove from the fridge 10-15 minutes before you want to serve it - it will be very firm, and use a large sharp knife to cut into squares. The mixture is VERY rich but I'm greedy, so my squares were massive.