
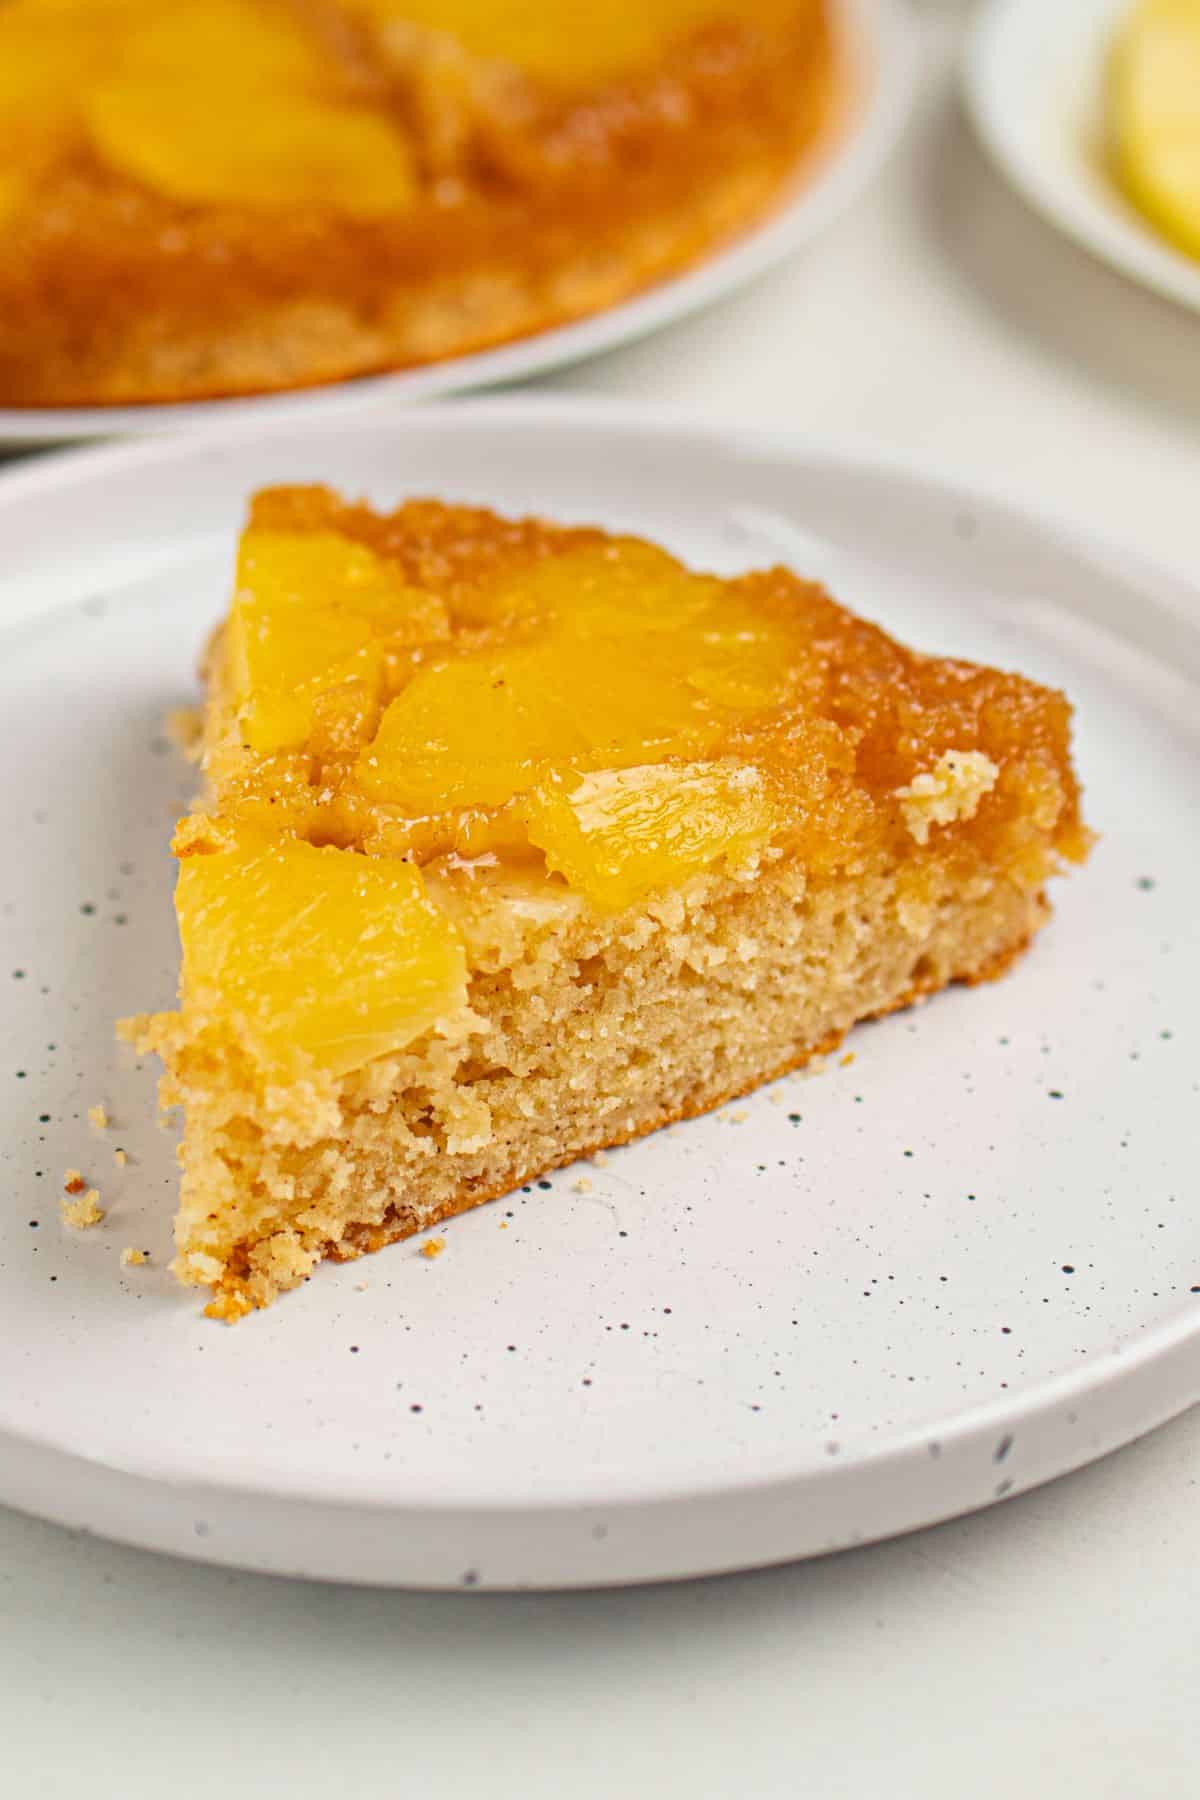
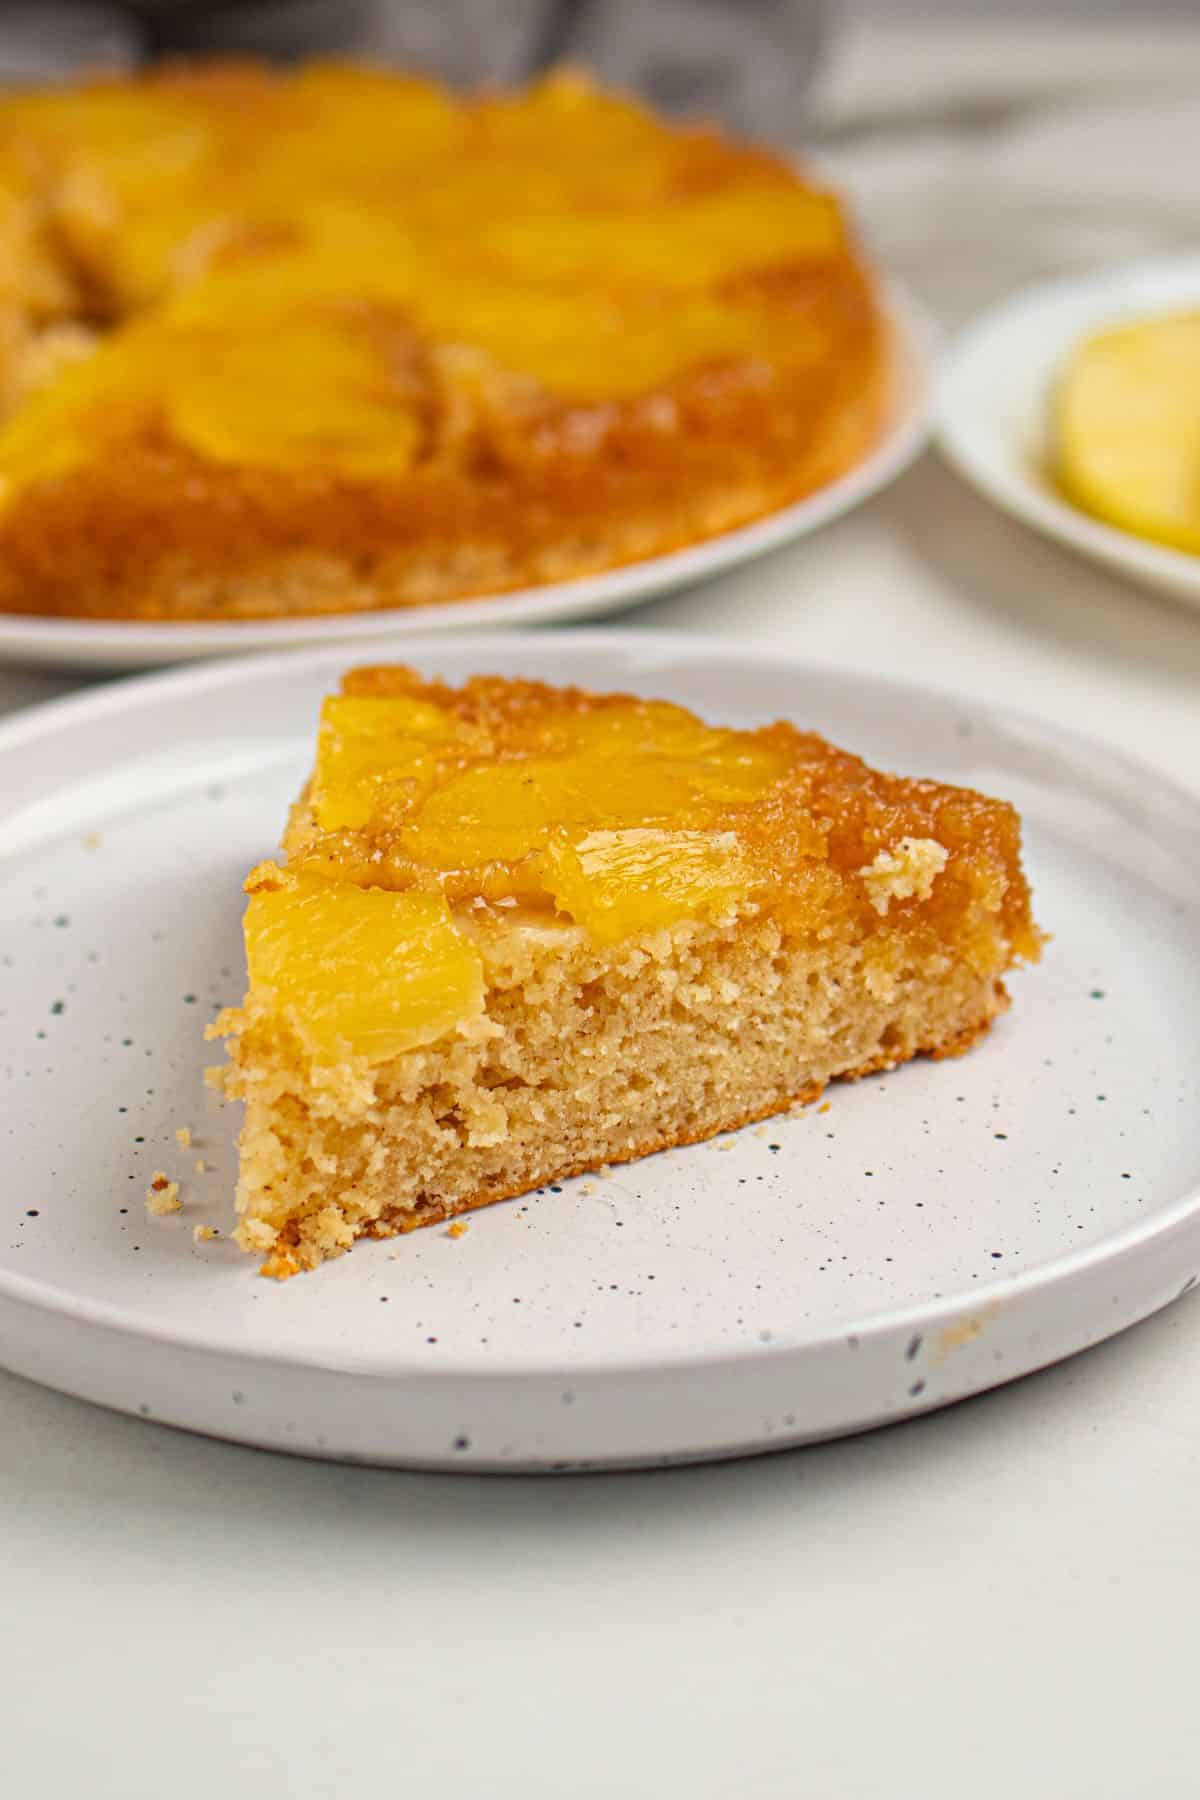
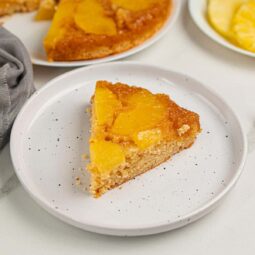
Golden, syrupy, and delicious, this Classic Pineapple Upside-Down Cake is deceptively simple to prepare. As it bakes, the pineapple layer caramelizes into a sticky, sweet topping that sinks into the tender, buttery cake beneath. It is a nostalgic, comforting slice of heaven that feels special without being fussy. You don’t need expert baking skills; just raid your pantry and grab some canned pineapple (or fresh if you have it) to get started.
This retro dessert has been a staple at family dinners and holiday tables for generations. While it shines in the warmer months when tropical fruit is peak season, the convenience of canned pineapple makes it a year-round favorite.
This bake takes cues from other inverted fruit desserts, such as the Upside Down Apple Tart, which features sticky fruit crowning a moist sponge. If you are a fan of that style, this pineapple variation offers a delightful tropical twist.
Ingredients
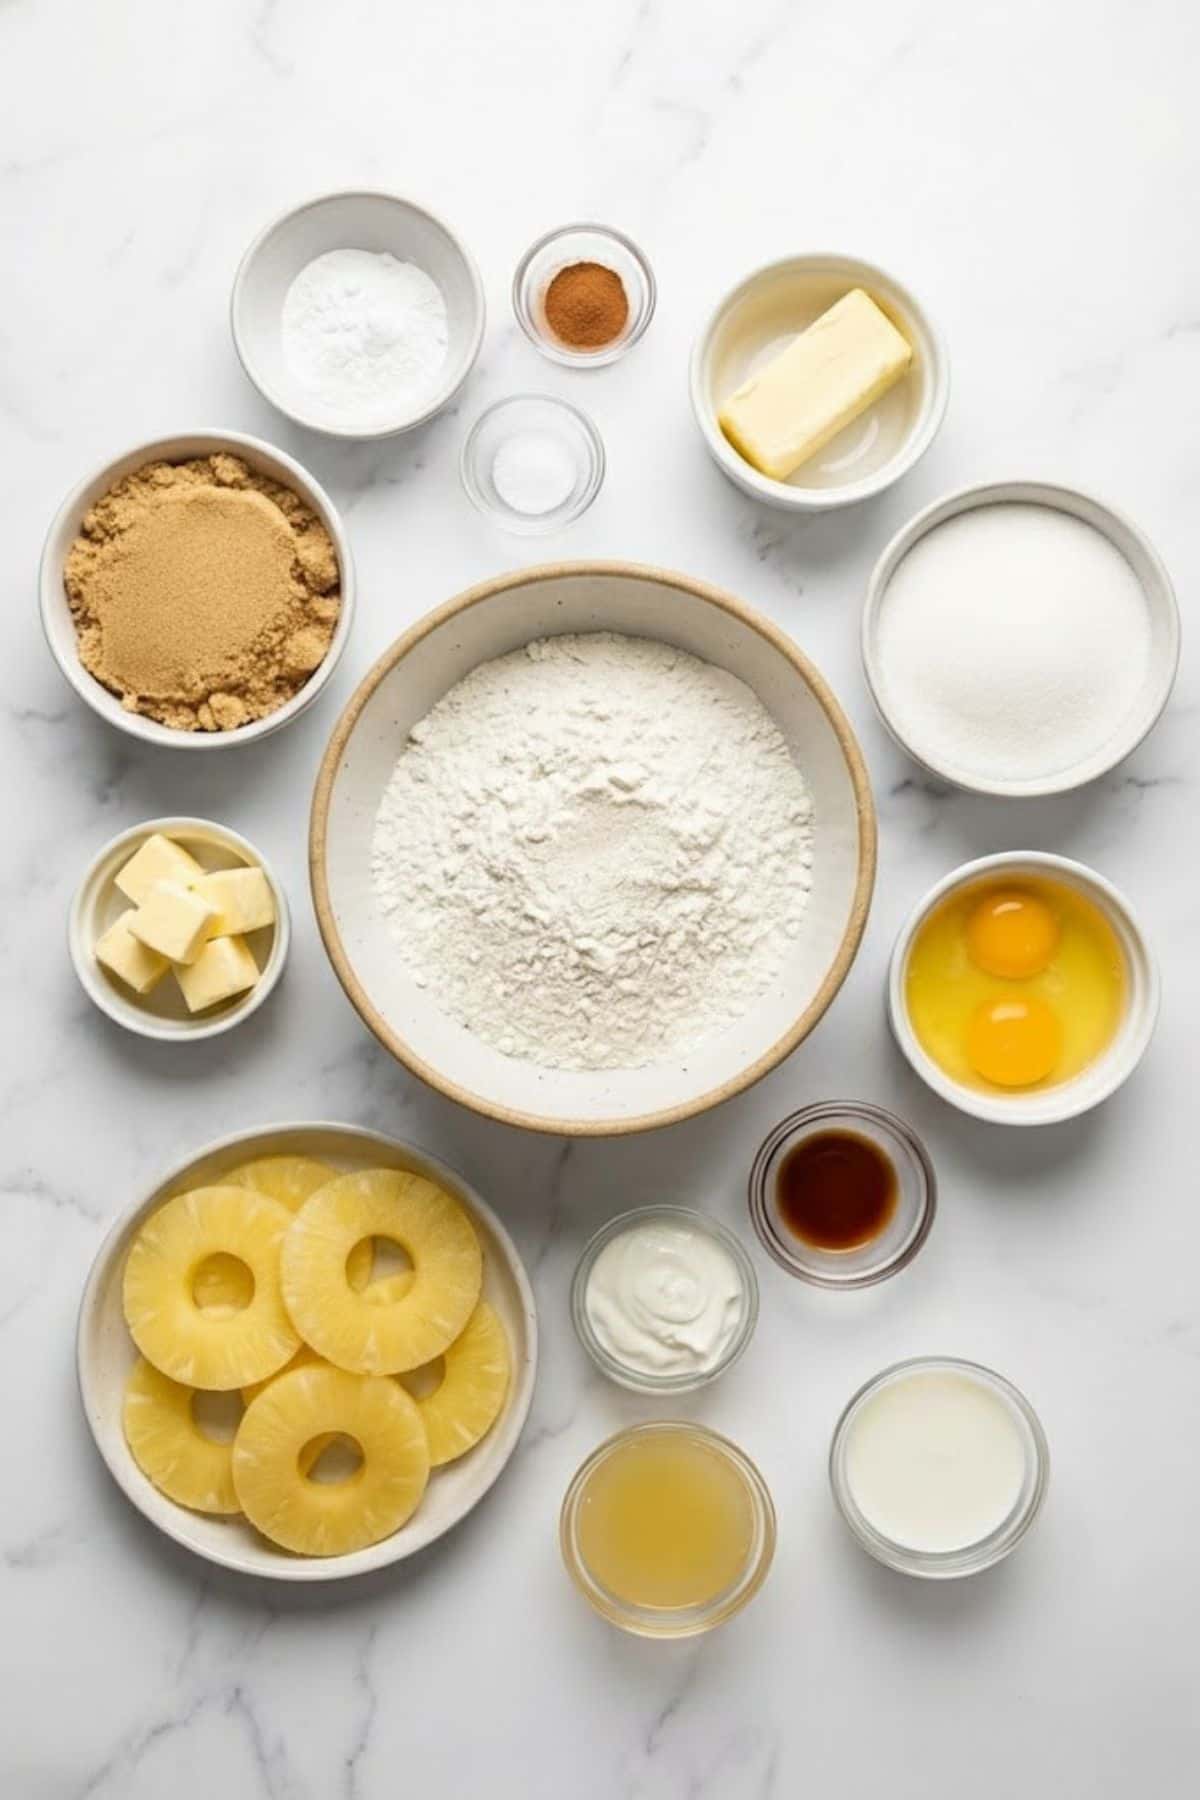
- Butter provides the rich base for both the caramel sauce and the cake crumb.
- Brown sugar melts down to create the sticky, golden glaze.
- Pineapple rings become tender and juicy as they bake.
- All-purpose flour provides structure for a soft, fluffy sponge.
- Baking powder & cinnamon ensures a good rise and adds a hint of spice.
- Eggs & vanilla bind the mixture and enhance the flavor profile.
- Sour cream, milk & pineapple juice ensure the cake stays incredibly moist.
See recipe card for quantities.
How to Make Pineapple Upside-Down Cake
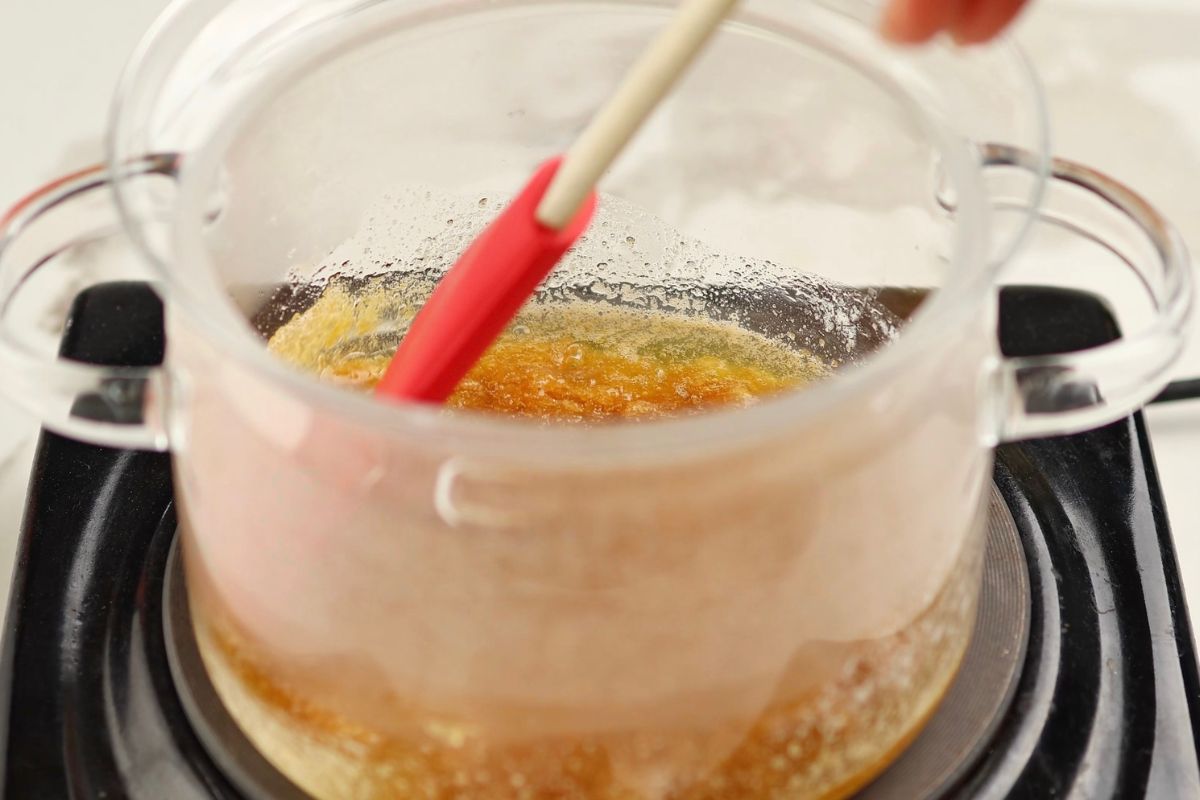
Set your oven to 350°F (175°C). In a small saucepan, melt the butter over medium heat. Whisk in the brown sugar and let it bubble for about a minute until it transforms into a smooth caramel.
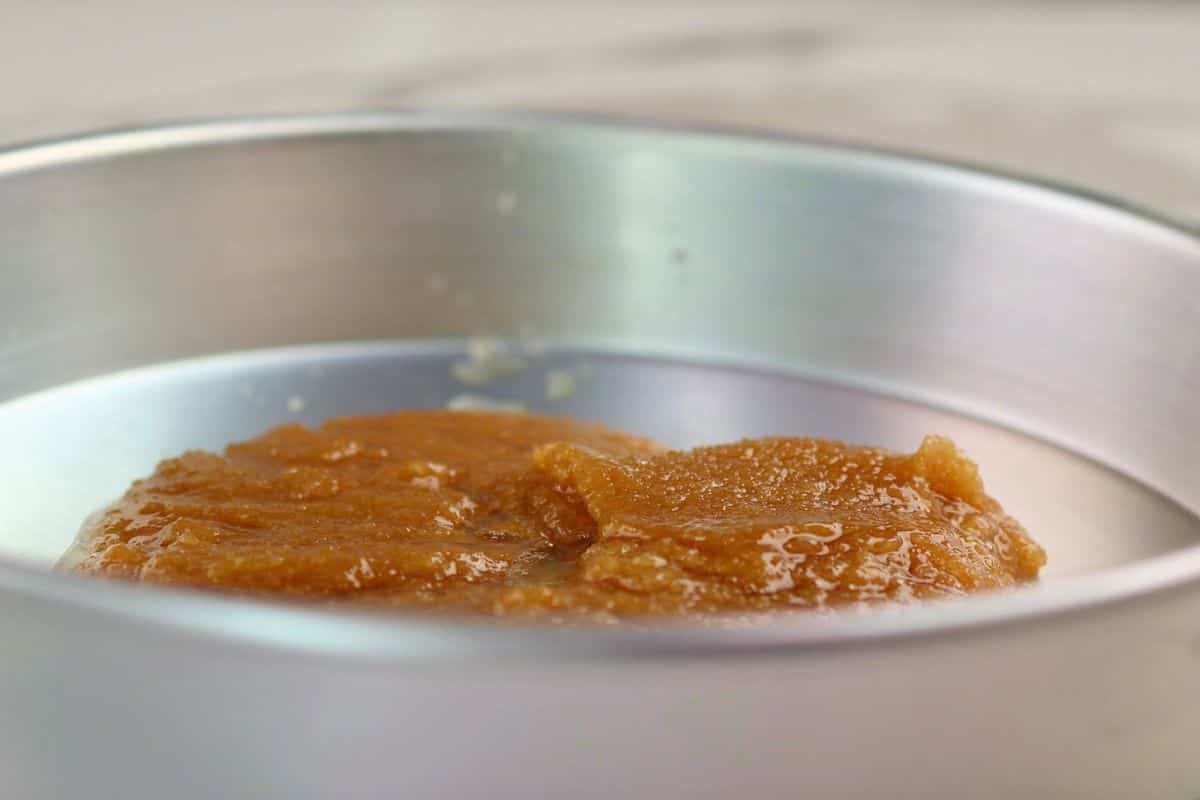
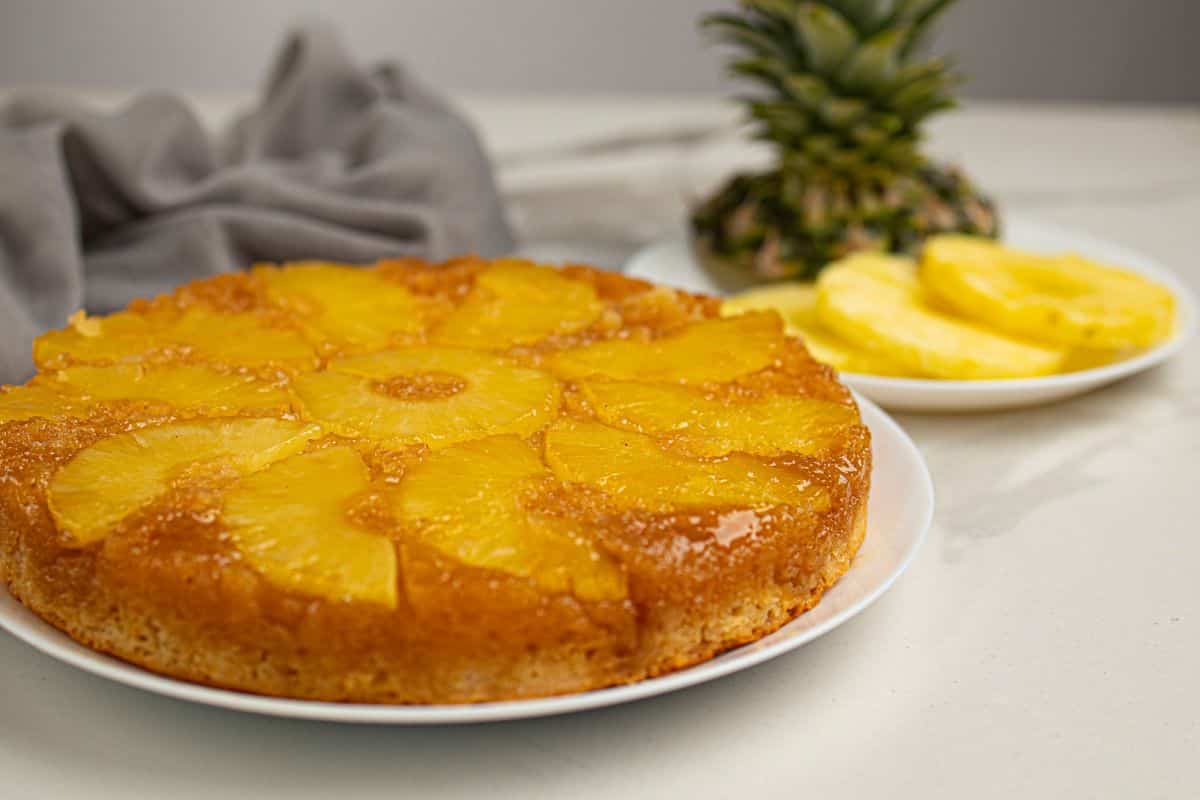
Empty this caramel sauce into a 9-inch round cake tin, tilting it to coat the bottom evenly.
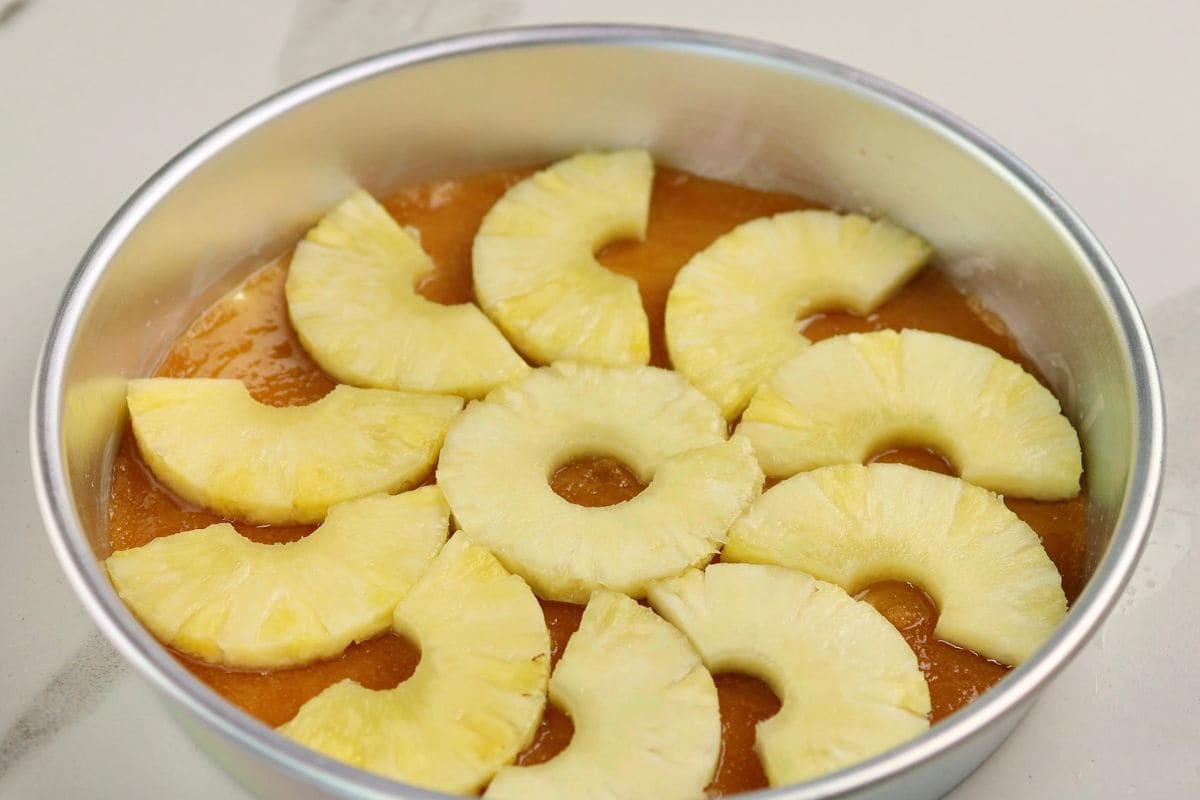
Place the pineapple slices artistically over the brown sugar layer.
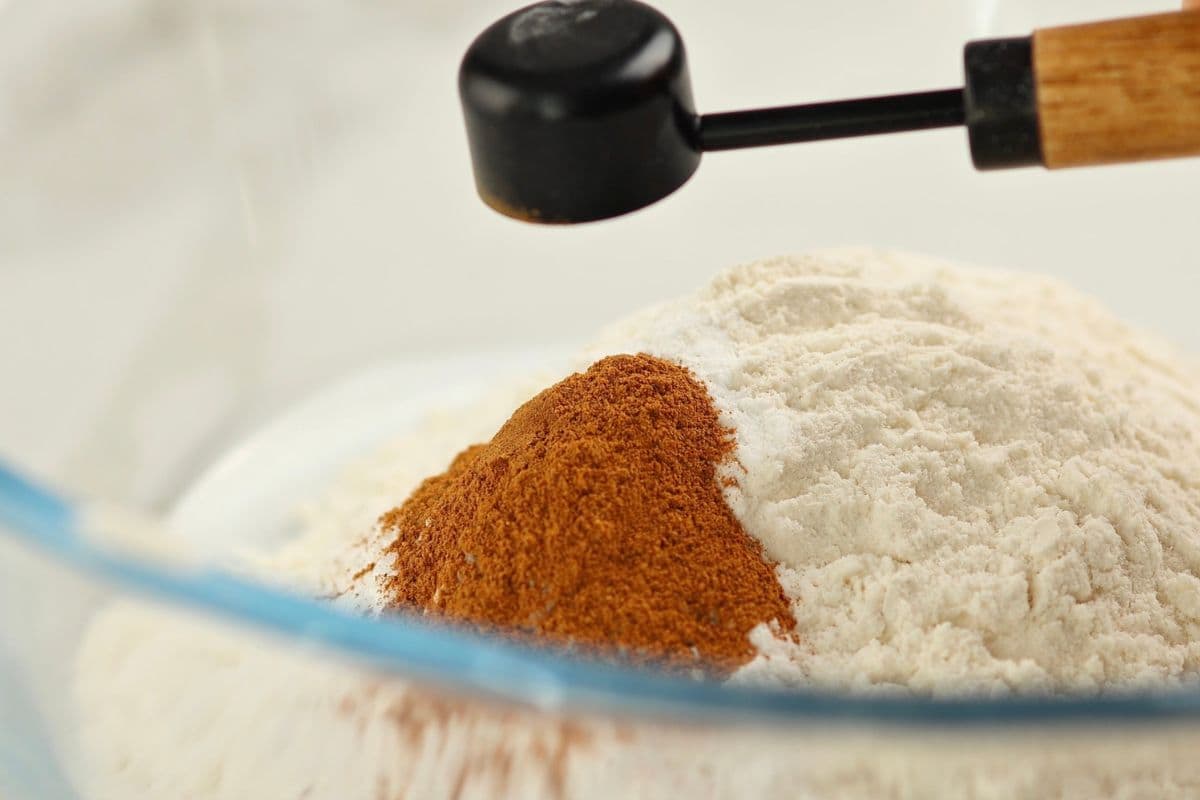
In a mixing bowl, combine the dry ingredients: flour, cinnamon, baking powder, and salt.
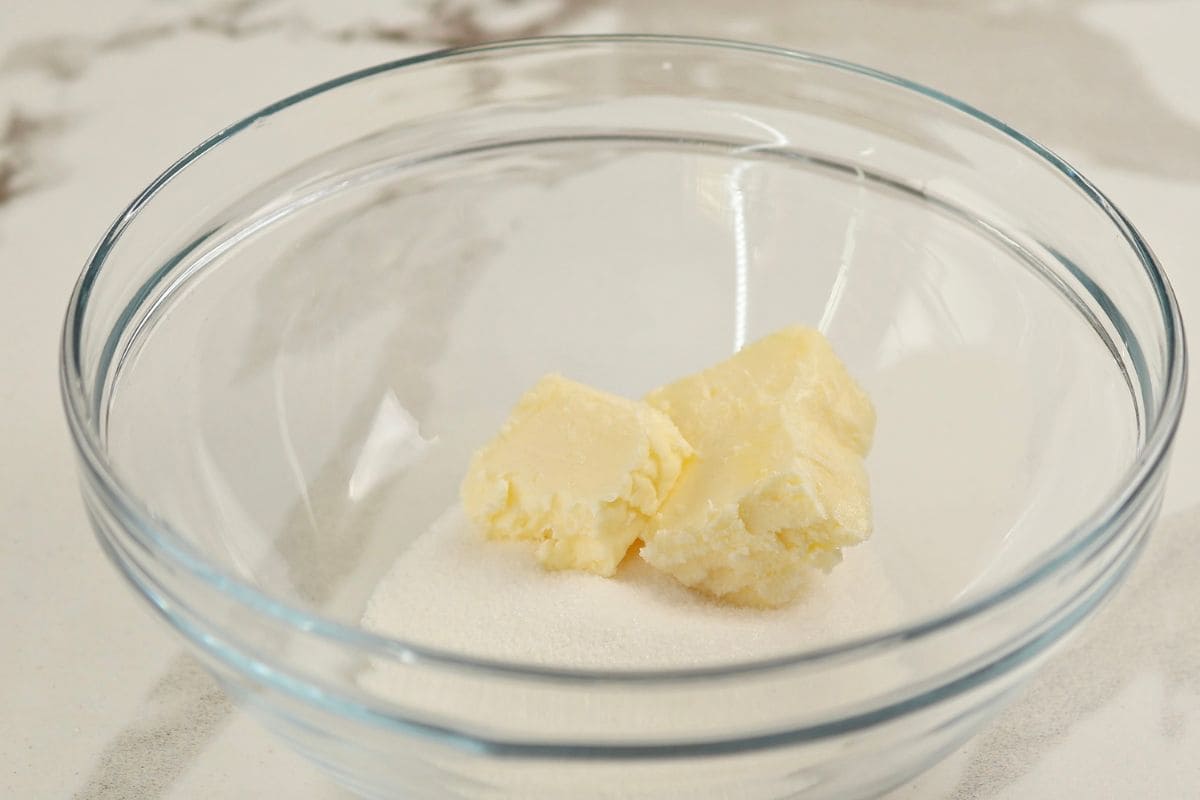
Using a stand mixer or hand mixer, beat the room-temperature butter and white sugar in a large bowl until pale and fluffy (approx. 2 minutes).
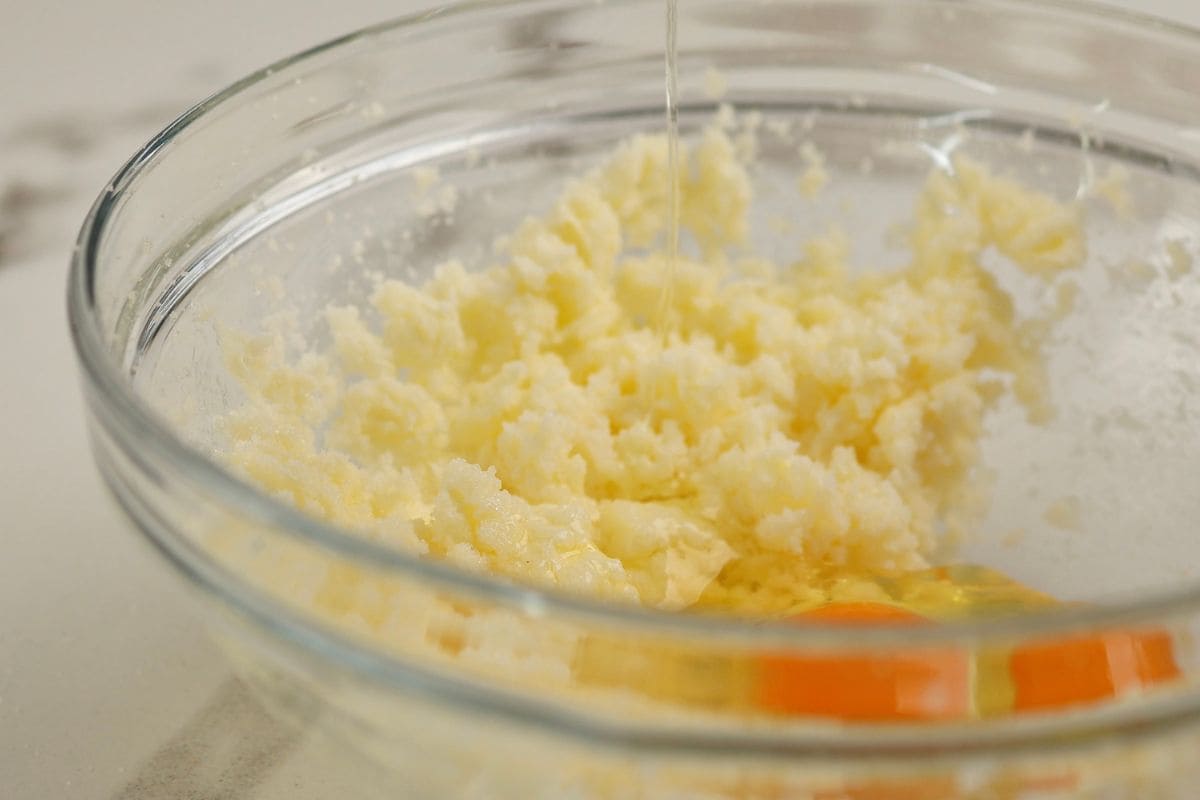
Beat in the eggs one by one, ensuring each is fully incorporated before adding the next.
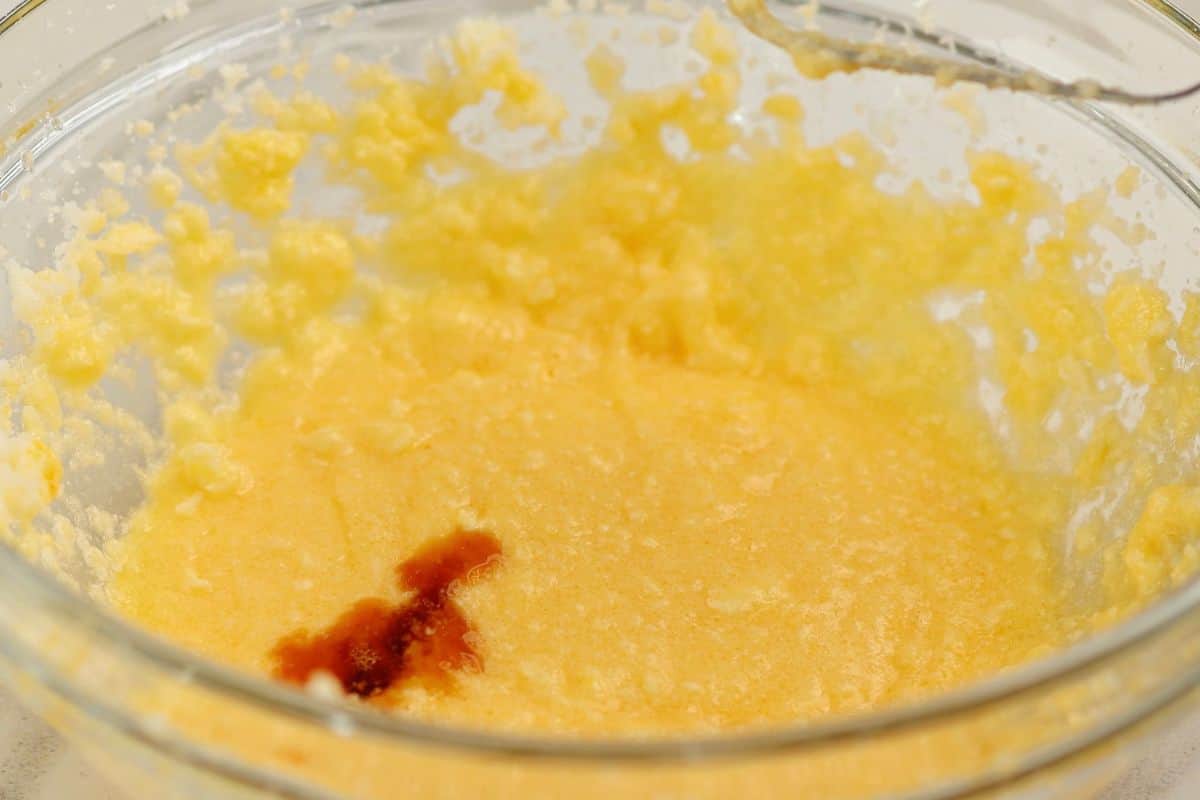
Mix in the vanilla extract.
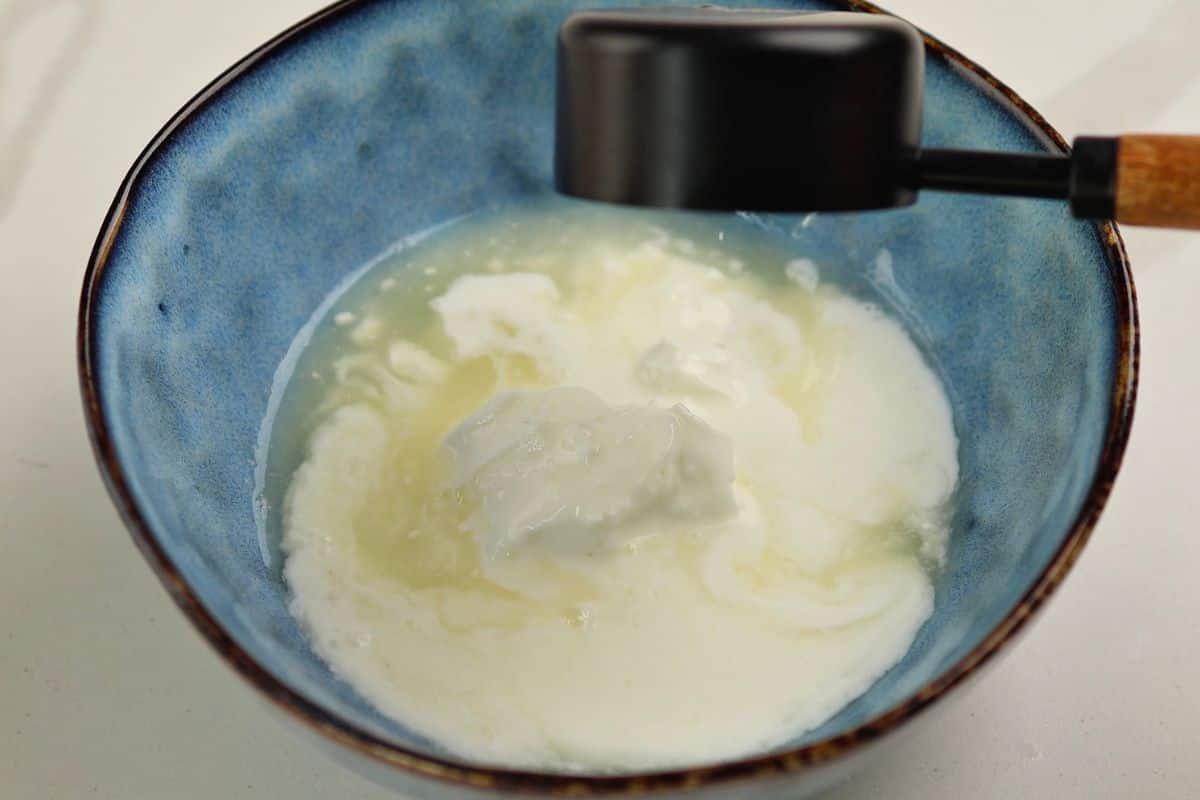
In a separate small container, whisk together the milk, pineapple juice, and sour cream.
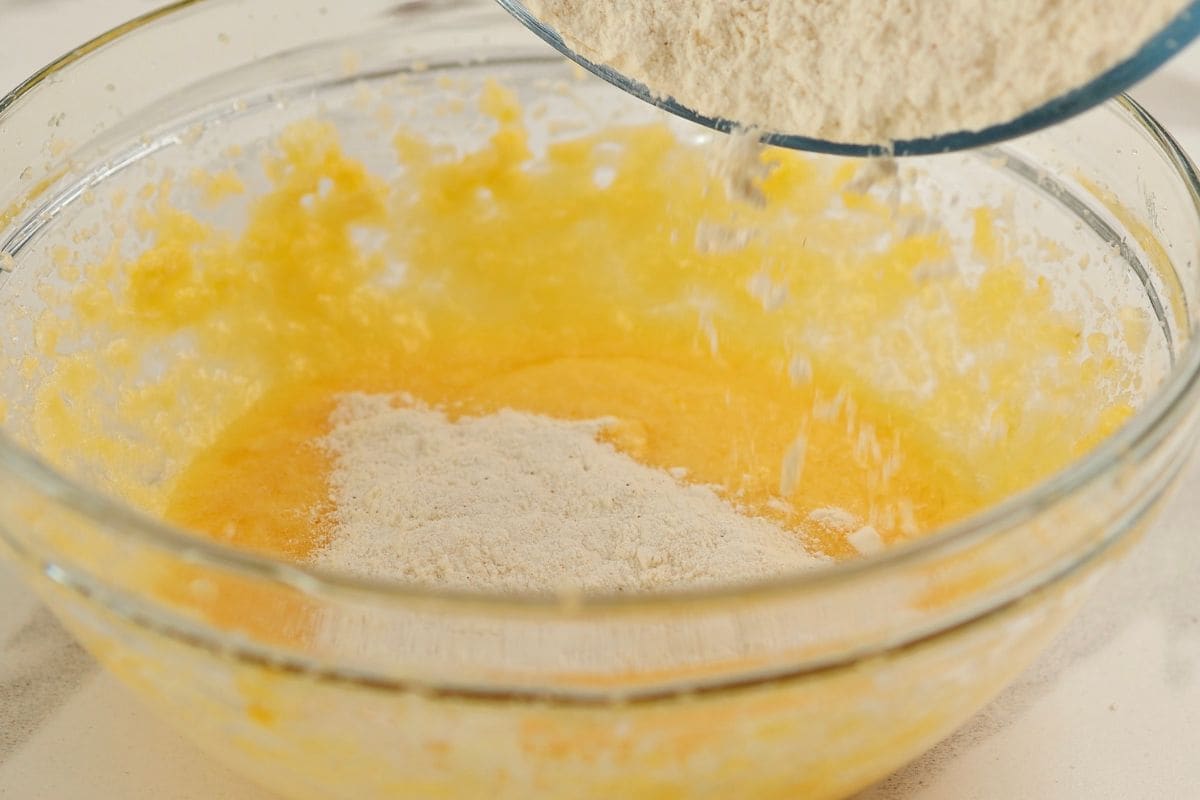
Slowly incorporate the dry ingredients and the wet sour cream mix into the butter mixture, alternating between them.
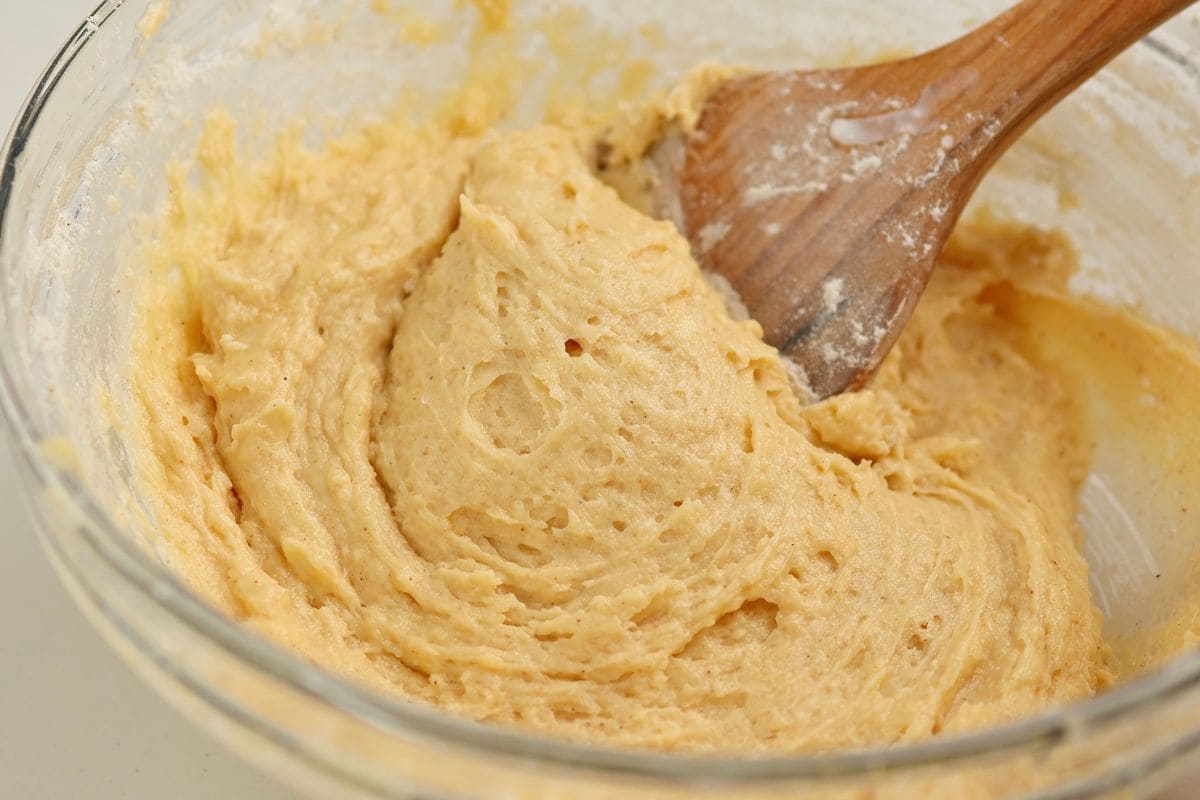
Start with flour and end with flour, mixing gently until the batter is just combined.
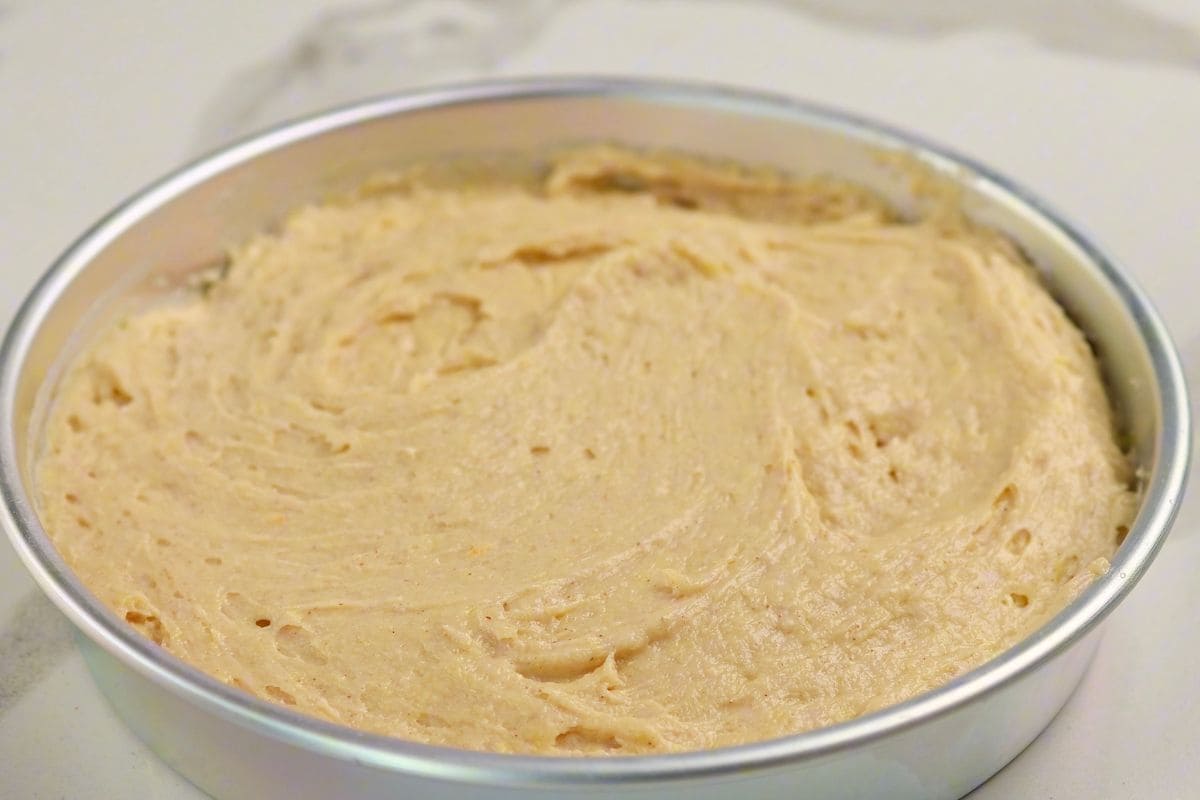
Gently pour the batter over the pineapple layer in the pan, spreading it out to create an even surface.
Bake the cake for 40 to 45 minutes, testing it with a toothpick to ensure it comes out clean.
Allow the cake to cool in the pan for about 10 minutes after removing it from the oven.
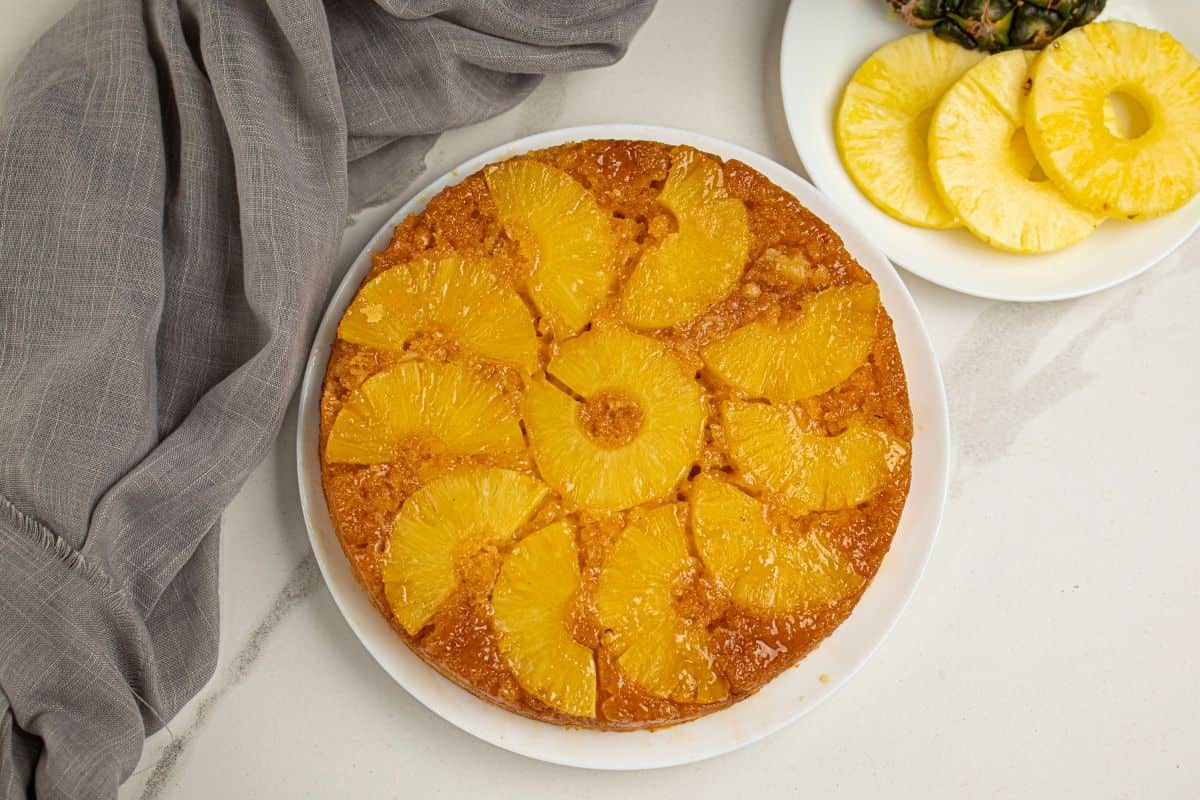
Use a knife to separate the edges of the cake from the pan. Place a plate upside down on top of the pan, then confidently flip the cake onto the plate.
Let gravity do its work for a moment before lifting the pan away, ensuring the caramel topping stays intact.
Hint: If the caramel layer seems stuck or hardened, briefly warm the bottom of the pan on the stove to loosen it before flipping.
Substitutions & Variations
- Diet-friendly: Swap in plant-based butter and milk or sugar alternatives for a lighter option.
- Fruit swap: Experiment with mango slices, pears, or peaches for a different flavor profile.
- Extra indulgent: Top with a scoop of vanilla bean ice cream or a drizzle of heavy cream.
- Kid-friendly: Place maraschino cherries in the center of each pineapple ring for a pop of color.
Crucial Success Tips
Avoid overworking the batter to keep the cake tender. Ensure the pineapple is thoroughly covered by the batter. Allow the cake to rest before inverting so the caramel sets properly but doesn’t harden completely.
FAQ
Can I use fresh pineapple?
Absolutely! Just cut about 7-8 slices and pat them dry.
Can I make this gluten-free?
Yes. Substitute the flour with a 1-to-1 gluten-free baking blend. Keep an eye on the baking time and test for doneness.
Classic Pineapple Upside-Down Cake
Ingredients
- For the Topping:
- 4 tablespoon unsalted butter
- ½ cup light brown sugar
- 8 pineapple rings canned or fresh
- For the Cake Batter:
- 1 ½ cups all-purpose flour
- 1 ½ teaspoons baking powder
- ½ teaspoon ground cinnamon
- ¼ teaspoon salt
- ½ cup unsalted butter 1 stick softened
- ¾ cup granulated sugar
- 2 eggs large
- 1 teaspoon pure vanilla extract
- ¼ cup sour cream
- ¼ cup pineapple juice reserved from canned pineapples or fresh
- ¼ cup whole milk
Instructions
- Preheat the oven to 350°F (175°C). In a small saucepan over medium heat, melt the butter. Stir in the brown sugar and cook for about 1 minute, until the sugar dissolves and forms a smooth caramel-like mixture.
- Pour this mixture into a 9-inch round cake pan, spreading it evenly over the bottom.
- Arrange the pineapple rings on top of the sugar mixture.
- In a medium bowl, whisk together the flour, baking powder, cinnamon, and salt.
- In a large bowl, using an electric mixer, cream together the softened butter and granulated sugar until light and fluffy (about 2 minutes).
- Add the eggs one at a time, mixing well after each addition.
- Stir in the vanilla extract.
- In a small bowl, mix the sour cream, pineapple juice, and milk.
- Gradually add the dry flour mixture and the wet sour cream mixture to the butter mixture, alternating between the two.
- Begin and end with the flour mixture, mixing until just combined after each addition.
- Carefully spoon the batter over the arranged pineapple in the cake pan, smoothing it out evenly.
- Bake for 40-45 minutes, or until a toothpick inserted in the center comes out clean.
- Remove from the oven and let cool in the pan for 10 minutes.
- Run a knife around the edges of the pan to loosen the cake. Place a serving plate upside down over the cake pan and carefully invert the cake onto the plate. Let it sit for a few minutes before lifting off the pan, allowing the caramel topping to settle.
How to Store Pineapple Upside-Down Cake
Refrigerate leftovers in a sealed container for up to 3 days. For longer storage, wrap securely in foil and plastic wrap, then freeze for up to 2 months. Thaw in the refrigerator before serving to preserve the texture and topping.